 Now these little trees can vary in sizes and you will always need to start with a square (6x6, 7x7, 8x8, 8.5 x 8.5, 12 x 12 are the sizes that I have done them). The supply list that I am going to give to you is based on starting with 12x12 piece of cardstock (for smaller sizes you will need less).

paper trimmer
hot glue gun
packaging tape or some other heavy clear tape
1- 12"x12" piece of solid cardstock (neutral colors--whites, beige, kraft--I just used green because I have a lot of it right now)
2 - 12" x 12" pieces of double-sided pattern paper
1 -3"x3" square piece of same pattern paper ( decrease this square if you make a smaller tree...example 8 1/2"x8 1/2" or 8"x8" make this a 2"x2" square)
paint brush
pencil
string (13" long)
bling, other embellishments, glitter glue, glitter to decorate your tree
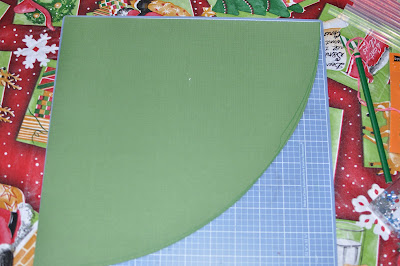
 Tie your piece of string to your pencil. You will want your string to be 12 inches long after you've tied it to the pencil ( or whatever size your cardstock was to start with). Holding the end of the string at bottom left corner of the 12"x12", extend your pencil to the upper left corner. While holding the string in place at the bottom left draw an arc from the upper left corner to the bottom right corner.
 Cut paper along the arc that you drew.
Butt-up the two sides to meet, tape with heavy packaging tape to form a cone. This takes a little playing with to get the cone shape because the paper naturally wants to form a tear drop shape. I tape on the inside and outside of the seam keep my cone shape.

This is what your cone will look like.
 Now using your paper cutter, cut your two sheets of pattern paper to 3/4"x3" strips of paper. I cut all my strips to 3/4" x 12" first them cut them down to the 3/4"x 3".
 Curl your strips of 3/4"x3" paper around your thin paint brush (you can also use a pencil or something else round). I prefer a thin paint brush because I can get a tighter curl out of it.
 Using your hot glue gun ( you could use other adhesive, but I prefer my hot gun because of the "instant stick" and you strips don't slide around), start applying your strips working all the way around the bottom then moving up. I have 23 strips on my bottom row.
I like to alternate my pattern paper on the rows when curling my pattern paper to make it more interesting. I end up with 8 rows on tree that I started with 12"x12" cardstock; 6 on one that started with 8 1/2" x 8 1/2". Once you've finished curling all your strips of pp, you will want to create a cone with your 3"x3" piece of paper the same way you created the base to your tree. This will become the top of your tree and hide the top that did not get covered with your strips.
 Decorate your tree with acrylic gems, stickles, or other embellishments to finish off your tree.
Have a great day and thanks for stopping in!


